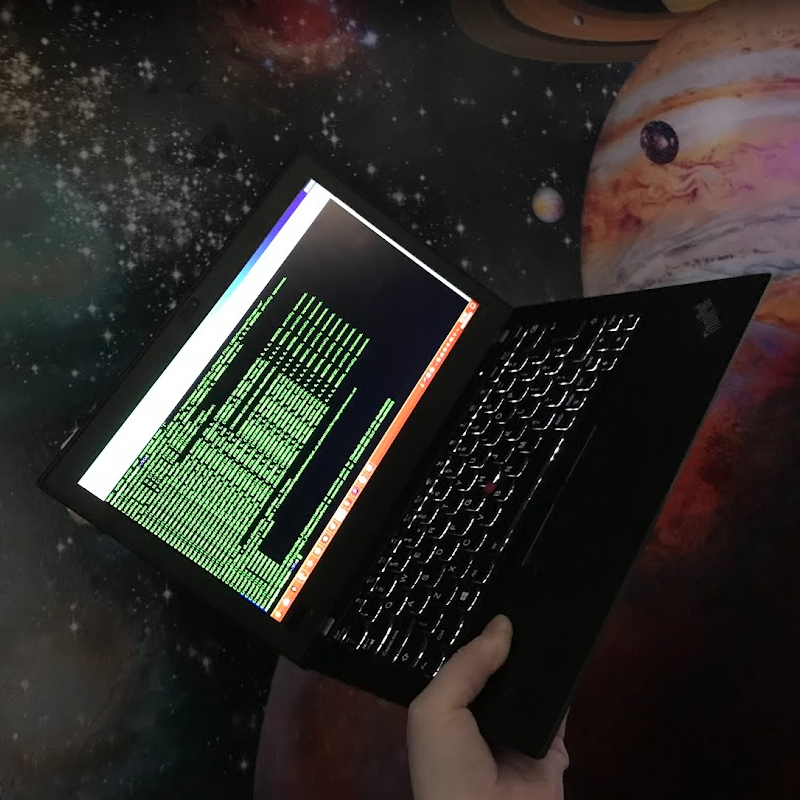
If you can hold your daily driver in one hand like this, you might have run into the same issue.
If you want to make your own static websites, something that might be confusing or frustrating for newbies is editing the code without any kind of live feedback, especially if you're inexperienced with writing html/css/js from scratch. Trying things and seeing how they work is the best way to learn, but without uploading all your files to your website, how do you know if it's working or not?
There's a few ways to do this without uploading everything and potentially breaking your site in the process!
Websites like codepen.io can let you edit your code in real time, with separate windows for your html, css, and javascript. This gives you the benefit of being able to easily share WIP versions with others, too, but one of the downsides is that codepen doesn't allow you to set your pens to private unless you're a premium user, so everyone on the internet can see it before it's ready, and you can't hide it when you're done unless you pay money or delete it. You also can't host any of your files there, so you'd need to upload all of your images elsewhere and link to them directly to make sure it's all working as intended.
If you're using an IDE or code editing software like Visual Studio to write, you can set up your project with all of your website's files in one directory on your computer, and launch a live view all inside one window. This works by running a local webserver, and it's super handy if you're editing a lot of things at once or building layouts from scratch.
But! If you're anything like me, you might be running on a low powered out of date machine with limited screen space, and IDEs can be a lil heavy on the hardware.
They're full of lots of cool features, but that sometimes comes at a performance cost, and they're rarely optimised for older machines. My little thinkpad was a beast ten years ago, but it can only do one thing at a time if it's running a full software dev suite now. And without an external screen, things get really cramped fast.
Instead, I prefer to work directly in my text editor while also running a separate http server, which will give my computer more breathing space to have multiple windows open at the same time and allow more flexibility for multitasking. Also, it's platform agnostic! If you can code in notepad, you can code in anything!
Personally, I'm running kubuntu on my laptop, which is just KDE flavoured ubuntu, so I'm using Kate as my default text editor and write all my code in it (including this page!)
It's lightweight, has lots of options that make it easier to keep track of your lines and indentations (very important if you're wandering into other languages like python), allows you to collapse your code so you can focus on specific sections, and has the ability to use different external tools. Most of which I have literally never touched but look very useful if you need them. :)
Kinda! I figured I'd make a step by step example of my local editing process for neocities users, specifically ones who personally identify with this button: 
If you use a different host, you can still follow these instructions, just as long as you can get access to a backup of your site. :)
I don't know what your skill level is, so I'm gonna assume you're a passionate newbie! Let's say you have no idea what I'm talking about and you're sick of hitting refresh on your neocities site every time you edit a line of code in the web editor, only to realise you've broken something else and you've lost all your backups... What should you do instead?
Head over to your dashboard, and at the bottom of your screen there are two options: Download entire site | Mount your site as a drive on your computer
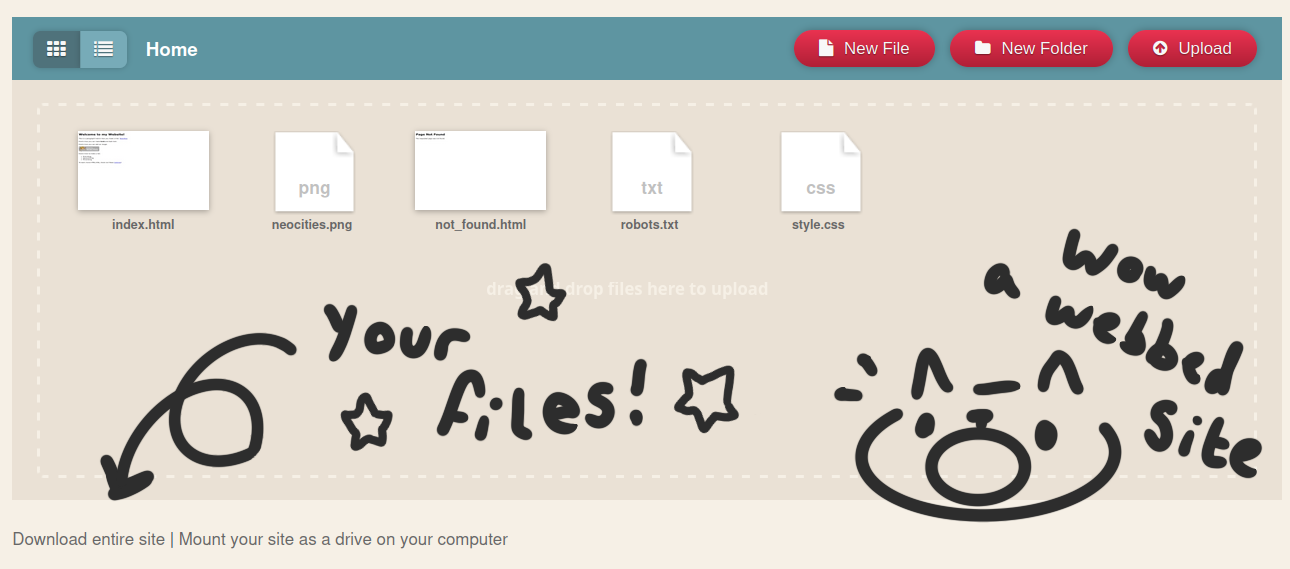
Either option is fine for receiving your files, but the latter takes more setup and instruction, so for the sake of keeping things simple let's go with "Download entire site". This allows you (once per hour) to download a backup of your website in a zip file. That's all the files stored serverside, including any images or media files you might have uploaded, with the same path structure you had on your site. Once you extract this zip file to your computer, you'll have a working copy of your site without anything being changed live on your site.
The folder you extract the contacts of your zip file into is the same as the root of your site. I've put my files in /home/aspen/projects/webdev/example/, and I plan to run my web server from /example/ so /example/ is my root folder. That means anything I put in here will be served from https://example.neocities.org/ when I upload it to the neocities servers at the end.
(Not literally example.neocities.org tho, this is, in fact, an example. Your username is the actual url that it'll go to.)
That is, assuming it's a public file! Also, index files work slightly differently; This adds their name to the end of your path, then any files inside them are added after that. Creating a subdirectory like this makes a link structured the same way making a basic html page named the same thing as the folder in your root directory would, except it allows you to serve an Fun fact, this overlap in link structure is a feature of modern web servers and browser behavior- you used to have to declare the .html at the end of your page links, the same way you used to have to include www. before your domain name, but now most setups can figure it out automatically for you. :)
You still don't have a live view of everything, so not much has changed- all we've done so far is make sure you don't accidentally break your published site by grabbing your backup and editing these copies instead. If you try to open your html files locally, you won't be able to see it working as intended- external files will be missing and it won't know where to find them. To test things locally in real time, what you need is an http server. This allows you to launch a local-only view of your website, so you can point to all your files properly but no one else on the internet can see your edits. All you have to do to make your changes "live" at this stage with a local server running is hit save in your text editor and refresh the page. I use python's http.server, which is super simple once python is installed on your system, as long as you're comfy writing some stuff in the terminal and you can find the location of your website folder. >Windows: Press the windows key + R to open the run dialogue (or search "run" in the start menu). Then type "cmd" and hit enter. You can also use windows powershell if you prefer, which you should be able to find if you type powershell in the search bar of your start menu. You might need to run it as administrator if you bump into permissions issues, just be careful executing code as admin. These steps won't break your system, but not all code plays nice! :) >macOS: My knowledge of macOS is pretty limited (I only run OS9 at home for retro stuff and it's been a while since I've used a mac for work, so ymmv! Let me know if this doesn't work for you and I'll update it!)
Press command (the ⌘ key) and space to open spotlight, then type "terminal" and hit enter. Alternatively, in the finder window for your website's files, press command + option (⌥) + T and it should open a new terminal window already in the right directory. >Linux: I'm going to assume if you've made it as far as installing a linux distro, you at least *kind* of know what you're doing. The linux side of this tutorial is mostly for people who are beginners to both web design and who aren't super familiar with their distro yet. Most distros let you open the terminal with control + T. Some file viewers will also let you open a terminal by right clicking in the directory you want to open it in. Once you're in your terminal: It should have your directory's path before your cursor when you type now, that means you're in the right spot. :)
You should get something like
This will allow you to access a local version of your website from your browser at
Whatever directory you launch it from is what will be visible from the server. So if you wanted to set up a folder that has all of your web development stuff in it in their own folders, including site backups or layouts you're working on, you could access them from their own url, eg http://0.0.0.0:8000/testlayout/mysite.html
Once you've done everything you want to do, make sure you have backups of your currently live site, and then it's time to reupload your files. You can do this in a few ways! If you can, set your work to autosave every so often. Consider learning how to use git so you can upload and save different versions of your project. Have backups that exist elsewhere too, like in a google drive or dropbox. You won't need it until you do.
This means that you shouldn't hardcode your links to their absolute path unless they're already hosted externally. If you're adding files that aren't already live on the internet, then you're not going to be able to see them as you make changes, resulting in a lot of broken code or outdated versions, and it'll save you a lot of headaches in the long run if you start off as you mean to continue.
Relative paths can get a bit confusing once you're nested a few folders deep, though. Everything with a / in front of it means that it's the path from root- the base url of your website, and when you're working locally, the directory you launched the server from.
But let's say I'm building Dipper's webpage, which is located inside a folder at
But! I also want to link to a file that's over in
In that case, I have a few options for how I link with relative paths, and I need to mix and match based on where the file is saved.
Basically, the relative path needs to be updated to be correct for the page you're working on, and keeping track of that can be a little confusing at first, but it gets way easier especially if you have dedicated folders for your files. You can reuse the same files this way without needing to have multiple copies of them, including js/css/html!
It'll also disappear if you close your terminal window or restart your computer. Your files are still there even if you close this, and all you need to do to if you want to restart it is run the command again.
Here's how you do that in different browsers:
Yeah, you'll need to refresh as you go with the basic web server. It can be a bit annoying, so if you want to have everything sync automatically the way it does on a site like codepen, you're going to need to dive a little deeper into python scripts. There's plenty of different options out there, written by people who know what they're actually doing, and I encourage you to have a little browse on github to see what other folk have come up with and figure out what works for you- But here's what I'm using for me, cobbled together with my limited knowledge and some AI assistance.
(Btw- that means you can take it and use it for whatever you want- any scripts I write with AI help I share as open source, because I can't claim ownership of something generated by something that was trained on other people's work. I don't know how to write python from scratch yet, but still need to make some custom tools, so this is the compromise!)
A quick recap on paths if you're not 100% sure what this means!
Anything placed in the root folder of your website (/) is accessible from your website's url by adding its path to the end of it.
/example/index.html in this case is just your neocities url homepage, https://example.neocities.org, since index.html files are always the default html file served for the directory they're in.
/example/image.png would be accessible at https://example.neocities.org/image.png
/example/text.txt would be at https://example.neocities.org/text.txt
and so on, etcAny subdirectories you wish to add are created by making their own folders inside your root folder, just like on your site.
index.html from inside the subdirectory and continue nesting more files inside more subdirectories.
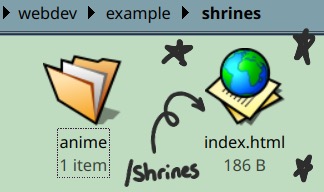
For example, if you want to make a page that leads to example.neocities.org/shrines, you could make a shrines.html file in root, but you wouldn't be able to make https://example.neocities.org/shrines/anime later without restructuring your site. Instead, you can make a folder called shrines, include an index.html inside of it, and then another folder called anime with its own index.html inside it.
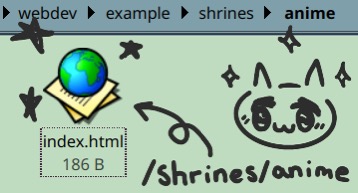
Basically, folders work as the /path/ inside the url of your website, and nesting them lets you /stack/your/paths/like/this. You don't need an index for each directory unless you want it to be visible as its own page, so you can play around with organising your files however works best for you and your projects.
Back to the files you just downloaded:
(This is how the live views in code editors work too, they're just bundled into the software so you don't need to run anything separately!)
If you're not confident working in the terminal or this is your first time, here's a quick rundown on how to access the terminal/cli for most operating systems:
>Linux:

    cd /home/yourusername/path/to/your/directory
>Windows:
cd C:\path\to\your\directory>macOS:
cd /path/to/your/directory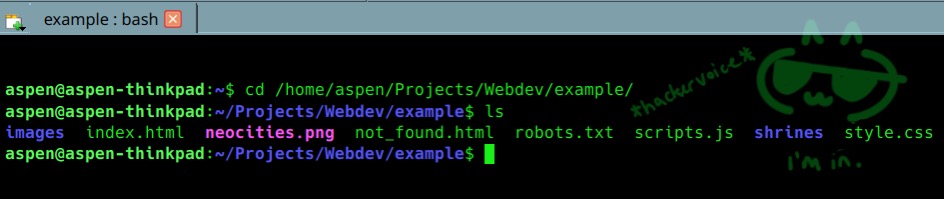
python --version and it should print which version you're running. If you don't have it installed, the instructions are slightly different depending on your OS:
Linux users:

Your distro's package manager will have an easy install option (eg sudo apt install python3 for debian based systems)
>Windows users:
You'll need to head to https://www.python.org/downloads/ to get the latest release.
>macOS users:

You can install it via homebrew by typing brew install python in your terminal, or download from the python website directly if you don't have homebrew installed.
python3 -m http.server 8000Serving HTTP on 0.0.0.0 port 8000 (http://0.0.0.0:8000/) ... in return. Congrats, that's it! You're ready to go!http://0.0.0.0:8000/ - only you can see this, and it's only accessible from your computer for as long as the script is running. You can set it up to be accessible to other people in your network, which is really useful for testing on multiple devices or even hosting your own website that's just for you and your family, but that's probably a project for another day.
That said, here's a quick local network webserver tutorial if you're up for a tangent and you really want to do it
Note: this isn't the same as your public ip! It's the ip address that your wifi router assigns to your device locally. It usually starts with 192.168. and yo can find it in a few different ways. If you have access to your wifi router's admin panel, you can look through the list of connected devices and find it there. Otherwise, do some fiddlin' in the terminal to get the right one:
Linux/macOS:
ip a
or ifconfig
Look for something like 192.168.x.x
or 10.0.x.x
Windows:
ipconfig
Look for IPv4 Address
python -m http.server 8000 --bind 0.0.0.0
This allows other devices on your network to connect to the server.
Normally you could go to "http://localhost:8000" on the computer you're running the web server script on and it would load the files no problem, but if you're on another device you need to point it through your network to the right place.
In your browser, go to:
http://your-ip-address:8000
Example:
http://192.168.1.42:8000
If your computer (or your network as a whole) has strong firewall protections enabled by default, you might need to give Python permission to serve the webserver across your whole network. Note: this only work to share the server on your private network, it won't expose anything to the internet unless you set up port forwarding or tunneling which is a whoooole other thing so dw about it!
Linux (UFW):
sudo ufw allow 8000
This opens port 8000 for incoming traffic. If you're using a different port, replace 8000 with the one you're using.
Linux (iptables):
sudo iptables -A INPUT -p tcp --dport 8000 -j ACCEPT
If you don't know what iptables is then you probably don't need to use it, this is for more advanced setups and I'm only including it just in case!
Windows:
When you first run the Python server, a firewall prompt might appear. Make sure to allow Python on Private networks (e.g. your home Wi-Fi). If you accidentally clicked "No", you can search for "Allow an app through Windows Firewall" and manually enable it later.
macOS:
Go to System Settings → Network → Firewall → Options and ensure Python (or Terminal, if you're running it from there) is allowed incoming connections.
If no prompt appears and things aren’t loading on other devices, try turning the firewall off temporarily just to test, or use:
sudo /usr/libexec/ApplicationFirewall/socketfilterfw --add /path/to/python3
Then:
sudo /usr/libexec/ApplicationFirewall/socketfilterfw --unblockapp /path/to/python3
(replace with your actual Python binary path if needed)
Just a heads up about permissions:
You might need to run some of these commands as administrator (Windows/macOS) or with sudo on Linux.
If that's the case and you don't feel confident making changes with admin privileges, I'd advise that you don't until you're more familiar with your own system and network in case something breaks. Also, burying the lead here a little bit, but if you’re on a school or managed network you most likely won't be able to open ports without admin rights. If that's the case you should contact your IT department for help/advice before trying to make any kind of network-wide changes. :3
Edit, then upload!
Easy Mode

By uploading the files on the neocities website via your dashboard with the upload button/drag and drop
Be aware this method doesn't play nice with big batches of files, or subdirectories and files inside them, so is best suited to just dropping in a few tweaked files or uploading to one directory at a time.
Intermediate Mode

By mounting your neocities site locally on your computer using webdav, and copying your files over.
A bit annoying to set up, but once it's done, this is easily the most convenient way to edit your site!
Hard Mode

By using the neocities API.
Other people have already done most of the work for you in building the framework for different languages, but you'll still need to do a lot of setup and and have a decent understanding of how the API works to use it. Feel free to read through the documentation and give it a shot!
Ready to get started? Here's some tips for your webdev adventure!
Save often, keep backups, don't assume everything will survive a crash.
When writing your code, the best practice is to use relative paths for everything that you link.
For example:

I want to link to an image. I plan to host it myself, no hotlinking, so it'll exist in my websites own files. In my backup folder that we made from the zip extract, from where we're serving the python html server, I put it inside another folder called images. When I upload it to the neocities server, I can use the absolute path to link to it from anywhere on my site or elsewhere on the web, but until it's actually uploaded (and I'm connected to the internet) that link won't work for local testing.

The relative path, however, will work with the local server even if I haven't already uploaded anything, even if I lose connection, even if neocities servers go down, and it will slot seamlessly into my website once everything is actually live.

The local path for me on my computer for this example would be /home/aspen/projects/webdev/example/images/image.png

The absolute path, once I've uploaded all of my files to neocities, would be: https://example.neocities.org/ioages/image.png

And the relative path, the one I want to use in my code: /images/image.png
eg:
https://example.neocities.org/ is my website's root, and /home/aspen/projects/webdev/example/ is my offline version's root/dipper/index.html, and I want to use files from /images/ in my root, but I also have a bunch of dip pics inside /dipper/images/ that are neatly organised away from the rest of my misc. files so that I can keep an eye on how many photos of him specifically I have.
/worlds/simpsons/ because, idk, maybe there's a picture of a dog there that kind of looks like him, and it doesn't make a lot of sense to reupload it to his directory just to link it once.
../ before the file name tells the server "go back one folder, then look for this file"/ before the file name means "look for this starting from root"and nothing before the file name (eg. just
image.png) means "look for it starting from this folder".
That also means any folders that exist inside this folder are included in this search too, you just need to point to them first without adding any dots or slashes
(eg images/image.png)To close your server, press control + C in your terminal window and it will exit.
Sometimes, locally cached versions of your files might persist, so if you hit refresh and your changes don't seem to be appearing, you should try a hard refresh.
Chrome (and other Chromium based browsers like Opera and Brave), Firefox, Microsoft Edge
Windows/Linux: Ctrl + F5 or Shift + F5 or Ctrl + Shift + R
Mac: Command + Shift + R

----------------------

Safari
Mac: Command + Option + R
(apparently safari doesn't hard refresh the same way as other browsers? but this should reload without using the cache)
Try out some custom scripts if you want automatic updates/https support/extra features.
Click to view the full script
#!/usr/bin/env python3
# === AUTO-INSTALL DEPENDENCIES ===
import sys
import subprocess
import shutil
DEBUG = "--debug" in sys.argv # detect early
# === CHECK FOR PIP FIRST ===
if DEBUG:
print("[🔍] Checking for pip...")
pip_path = shutil.which("pip") or shutil.which("pip3")
if not pip_path:
print("\n[🚫] pip is not installed on this system.")
print(" Please install pip before running this script.")
print(" Try: sudo apt install python3-pip\n")
sys.exit(1)
if DEBUG:
try:
version_output = subprocess.check_output([pip_path, "--version"], text=True).strip()
print(f"[ℹ️] {version_output}")
except Exception as e:
print(f"[⚠️] Failed to get pip version: {e}")
REQUIRED_PACKAGES = ["watchdog", "websockets"]
for pkg in REQUIRED_PACKAGES:
if DEBUG:
print(f"[🔍] Checking for package: {pkg}")
try:
__import__(pkg)
if DEBUG:
print(f"[✅] {pkg} is already installed")
except ImportError:
print(f"[❌] Missing '{pkg}', installing...")
subprocess.check_call([sys.executable, "-m", "pip", "install", pkg])
print(f"[✅] Installed '{pkg}' successfully")
# === REAL IMPORTS ===
import http.server
import socketserver
import threading
import asyncio
import websockets
import os
import time
import argparse
from watchdog.observers import Observer
from watchdog.events import FileSystemEventHandler
# === CONFIG ===
PORT = 8000
WS_PORT = 5678
WATCH_PATH = "."
clients = set()
RELOAD_EXTENSIONS = {
".html", ".htm",
".css",
".js", ".mjs",
".json",
".png", ".jpg", ".jpeg", ".gif", ".svg", ".webp",
".woff", ".woff2", ".ttf", ".otf",
".ico"
}
INJECT_SCRIPT = """
"""
# === CUSTOM HTTP HANDLER ===
class InjectingRequestHandler(http.server.SimpleHTTPRequestHandler):
def end_headers(self):
self.send_header("Access-Control-Allow-Origin", "*")
super().end_headers()
def do_GET(self):
path = self.translate_path(self.path)
if os.path.isdir(path):
path = os.path.join(path, "index.html")
if path.endswith(".html") and os.path.isfile(path):
try:
with open(path, "r", encoding="utf-8") as f:
content = f.read()
if "